


If you’re a developer or even just dipping your toes into programming, you’ve probably heard whispers, or full-blown hype, about Cursor, the AI-powered code editor built on top of VS Code. I’ve been using Cursor for several months now, and let me tell you: it’s not just another shiny tool. It actually makes coding easier, especially if you know how to work with it.
What Is Cursor?
Cursor is essentially a VS Code fork with AI built directly into the editor. That means it looks and feels a lot like VS Code (because it is), but it’s got an AI assistant right there with you as you code. It’s kind of like having a super knowledgeable pair programmer that doesn’t get tired or passive-aggressive.
You can ask it to:
Explain code (yours or someone else’s)
Generate new functions
Fix bugs
Refactor code
Write tests
Even do full-on feature implementations
But here’s the kicker: it understands your entire codebase. So it’s not just shooting in the dark like ChatGPT sometimes does when you paste in a snippet.
Getting Started with Cursor
1. Install Cursor
Go to cursor.so and download the installer for your OS. It supports macOS, Windows, and Linux.
Once installed, it’ll look just like VS Code, same sidebar, same command palette, same feel. But you’ll notice a little AI icon in your editor. That’s your new coding partner.
2. Open or Clone a Repo
You can either open a local project or clone a Git repo directly from within Cursor. It’s smart enough to index your whole codebase for context, which is where the magic starts.
3. Ask Your First Question
You can hit Cmd+K (Mac) or Ctrl+K (Windows/Linux) to bring up the AI chat interface. Try something like:
“Can you explain what this
useEffecthook is doing?”
Or:
“Refactor this function to make it cleaner.”
Cursor responds right in the editor, often editing your file inline if that’s what you asked. It’s surprisingly accurate, and gets better the more it knows about your code.
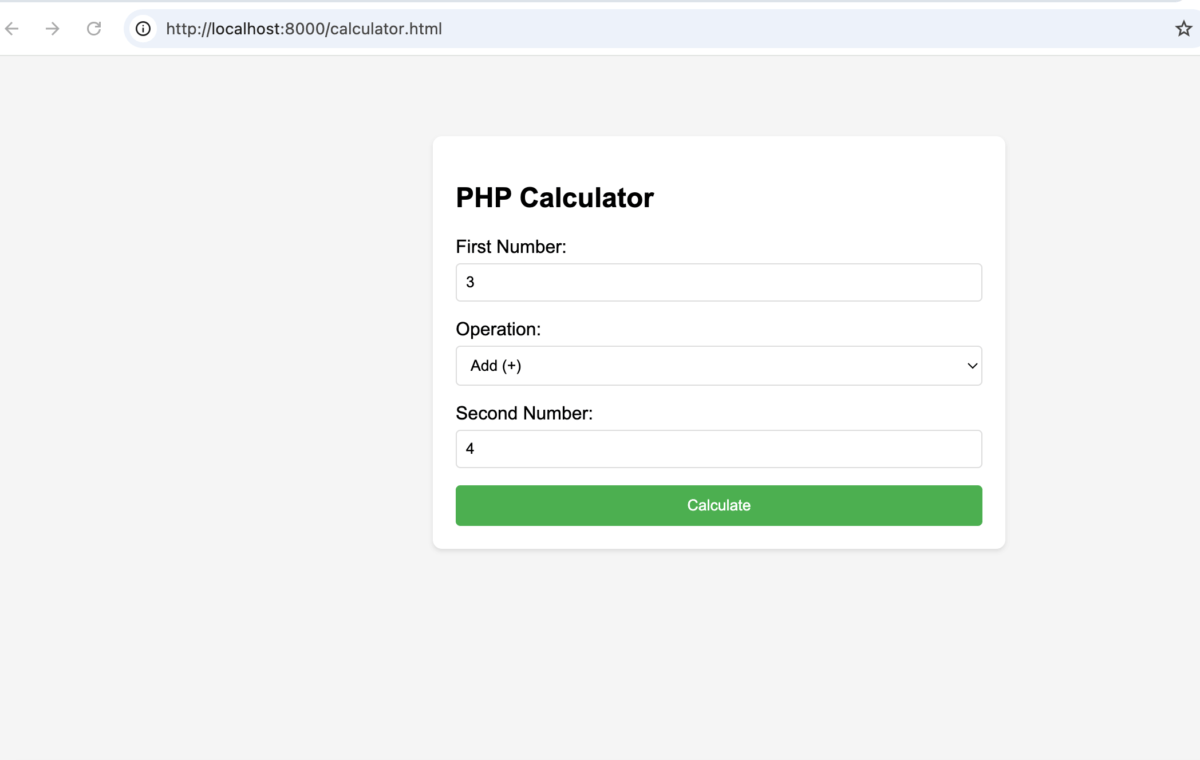
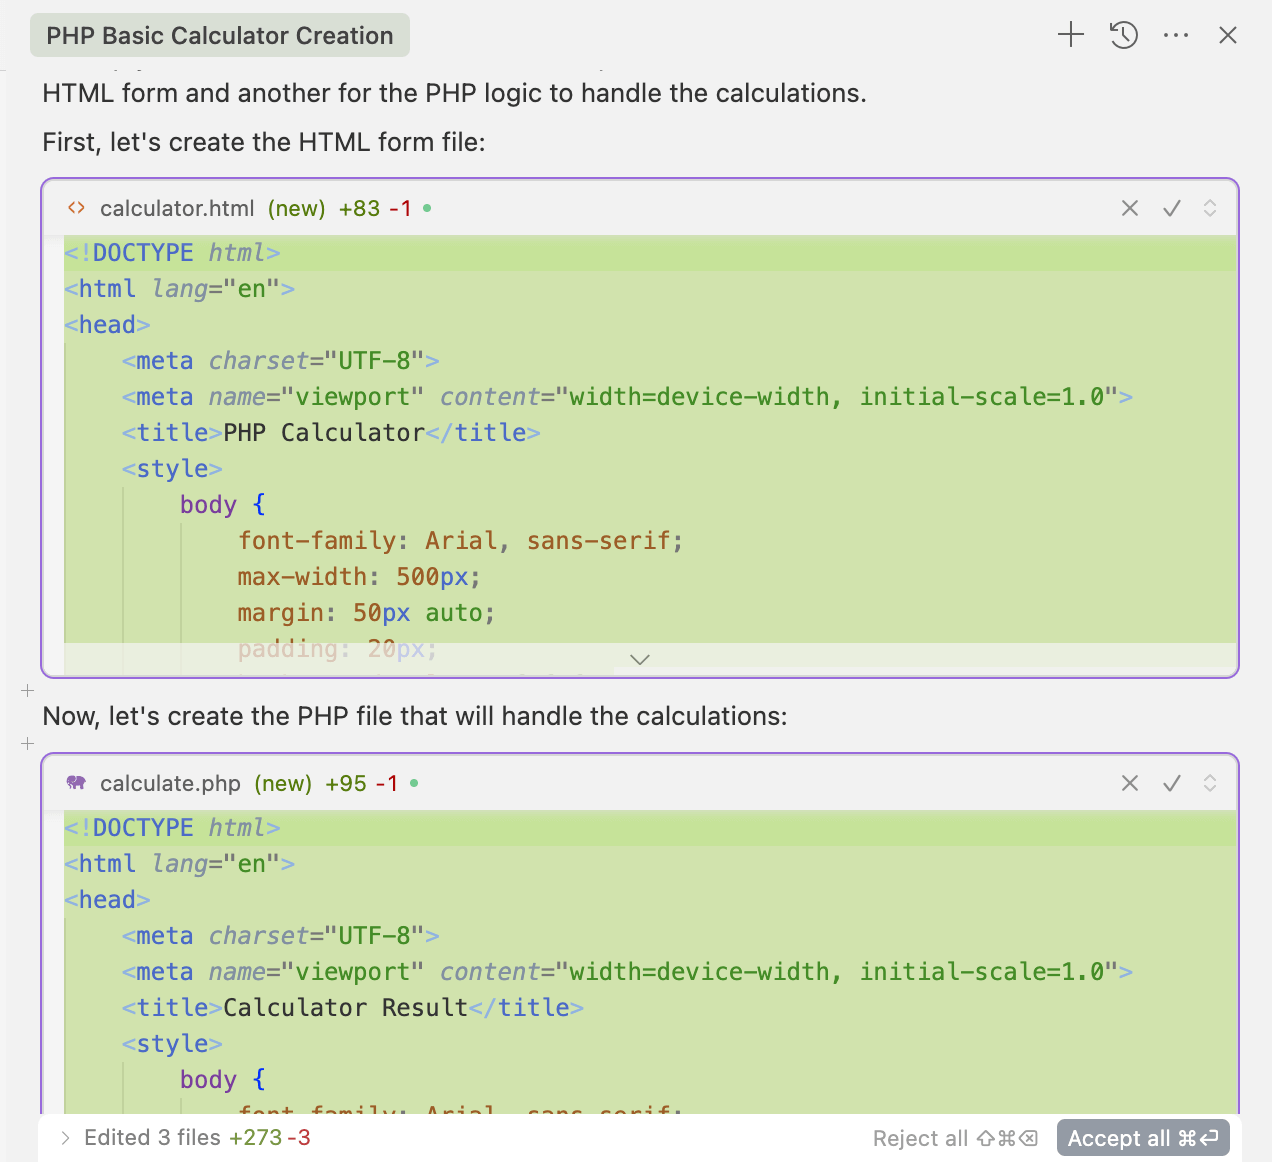
Cursor Example of creating a calculator
The prompt used was: “create a basic PHP calculator”.
In this AI programming test, we asked the model to create a simple calculator using a PHP backend. While building a calculator might seem straightforward, incorporating PHP introduces server-side processing, requiring the AI to handle both frontend and backend development aspects. This setup evaluates the AI’s ability to manage client-server interactions, process user inputs securely on the server, and generate dynamic responses.
Choosing PHP over a purely client-side language like JavaScript adds complexity by necessitating an understanding of server-side scripting and data handling. It tests the AI’s proficiency in structuring backend logic, managing HTTP requests, and integrating frontend interfaces with backend operations. Such a task mirrors real-world scenarios where applications rely on backend services for processing and data management.
This test effectively gauges the AI’s capability to produce functional, secure, and maintainable code across the full stack. It assesses the model’s understanding of web development principles, its ability to implement server-side logic, and its competence in creating cohesive applications that bridge frontend and backend components.
Kick Off a New Project
Open up Cursor and hit the option to start a new project. When it asks for the language, go ahead and select PHP. That’ll set everything up so you’re ready to start writing and running PHP code right away.
What Cursor Does Really Well
1. Contextual Awareness
Cursor reads your codebase (within a certain token limit), so when you ask it to implement a new feature or fix a bug, it’s pulling from real context, not just guessing.
Let’s say you’re working in a large Next.js app. You can ask:
“Create a new API route that pulls user data from Supabase.”
It’ll not only create the route, but reference your existing file structure, follow your coding conventions, and use your preferred libraries.
2. Inline Edits
One of my favorite things: you can highlight a block of code, right-click, and choose “Fix,” “Explain,” or “Refactor.” Cursor edits the code right there. No copy-pasting needed.
3. It Writes Tests Like a Champ
If you’re like me, you put off writing tests until the last possible minute. Cursor actually makes this painless. Just tell it:
“Write unit tests for this function using Jest.”
It’s saved me hours on frontend and backend testing.
Limitations
Okay, it’s not perfect. Here’s what you should watch out for:
1. Token Limit
Even though Cursor can read your codebase, it’s not infinite. Larger projects might cause it to miss files or lose track of distant code logic. If it’s acting confused, you might need to guide it more directly, like pasting in relevant code chunks.
2. Sometimes It Hallucinates
Yes, even with its context smarts, it occasionally makes stuff up. You’ll see it import a non-existent function or assume a variable exists that doesn’t. So you still need to double-check its work. (Think of it like a junior dev that’s super helpful but not always right.)
3. Git Integration Is Good, But Not Perfect
It lets you commit changes and even write commit messages, but I wouldn’t rely on it for handling complex git workflows. Use your terminal or native git tools for merges, rebases, etc.
A Quick Look: Cursor AI vs. ChatGPT vs. Copilot
Here’s a basic table from my personal experience:
| Feature | Cursor AI | ChatGPT-4 (in browser) | GitHub Copilot |
|---|---|---|---|
| Codebase context | Yes (real-time) | No (manual paste) | Minimal |
| Inline editing | Yes | No | Yes (suggests code) |
| Full file generation | Yes | Yes | Limited |
| Explains existing code | Yes (very well) | Yes | Not really |
| Refactors large code | Yes | Yes (with limits) | No |
| Works inside editor | Yes | No | Yes |
Key Features of Cursor AI and Their Benefits
Cursor AI is more than just a coding assistant, it’s a comprehensive tool that addresses multiple aspects of the development workflow.
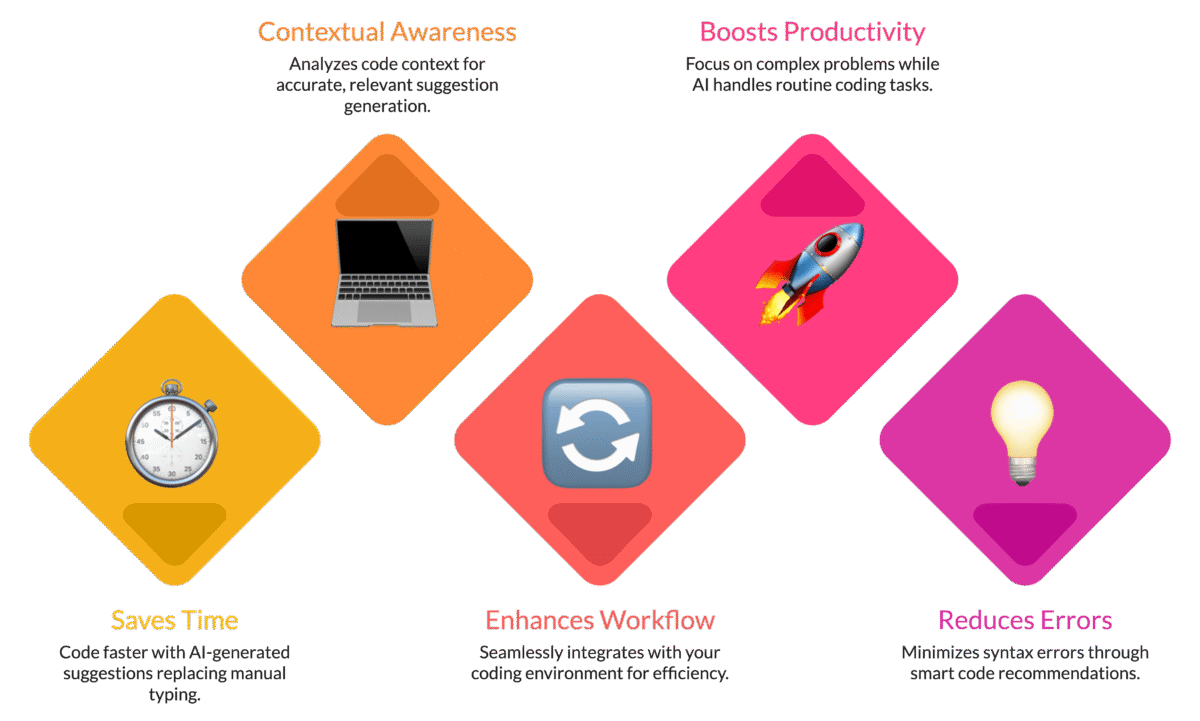
1. Autocompletion and Code Suggestions
What It Does:
Cursor AI provides contextual code suggestions based on the existing code structure, language syntax, and libraries being used. It analyzes the code context and predicts the next lines or blocks of code, offering relevant snippets that fit seamlessly into the existing logic.
Benefits:
Saves Time: Developers can write code faster by accepting AI-generated suggestions instead of typing out entire lines or structures.
Reduces Syntax Errors: Since suggestions are contextually accurate, they help minimize common syntax mistakes, preventing potential bugs early in the coding process.
Enhances Learning: For less experienced developers, the suggestions serve as a learning tool, demonstrating best practices and efficient coding patterns.
Example Use Cases:
Writing repetitive code structures like loops, conditionals, or database queries.
Implementing standard functions such as API requests, data processing, or error handling.
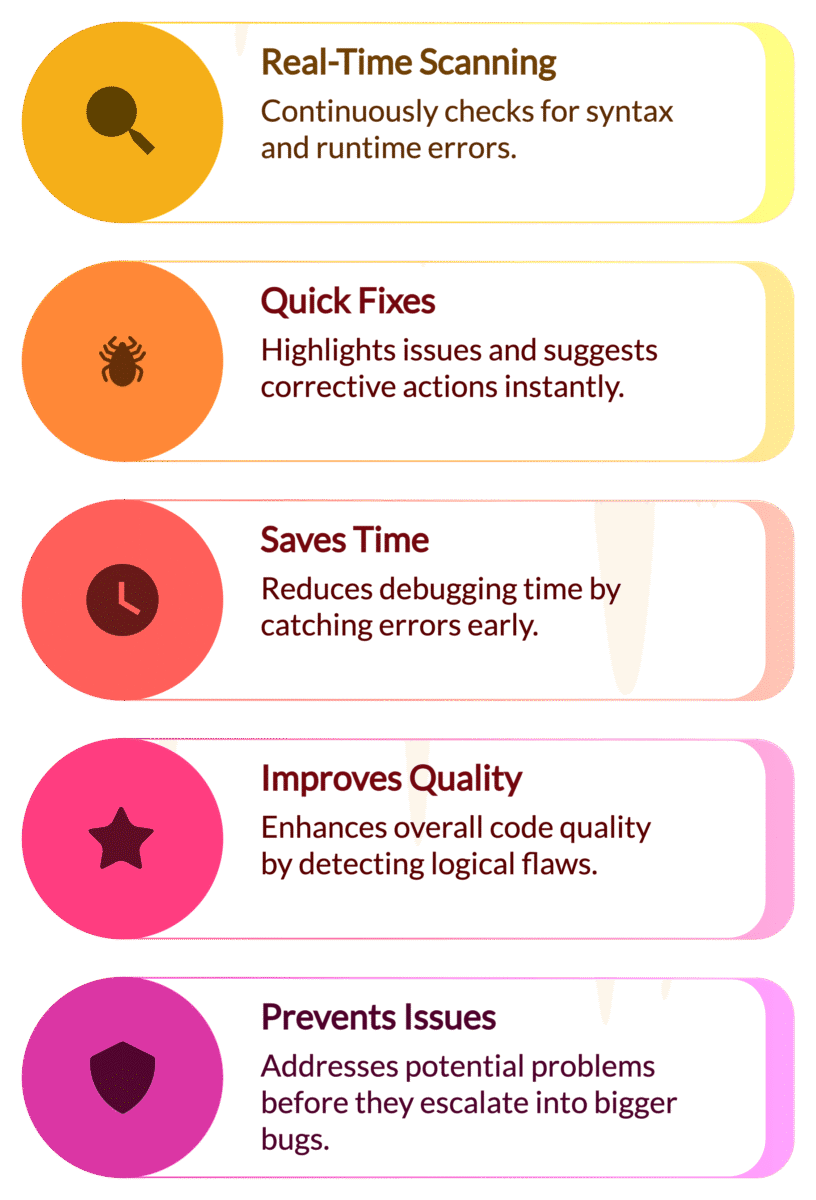
2. Error Detection and Debugging
What It Does:
Cursor AI continuously scans the code for potential issues, including syntax errors, runtime exceptions, and logical inconsistencies. It highlights problematic lines of code and suggests corrective actions to resolve them.
Benefits:
Reduces Debugging Time: Detects errors in real-time, allowing developers to fix issues before they escalate.
Increases Code Quality: By identifying potential logic errors, it ensures that the code is not only syntactically correct but also logically sound.
Minimizes Technical Debt: Early error detection prevents the accumulation of unresolved bugs, leading to cleaner, more maintainable codebases.
Example Use Cases:
Catching undefined variables or missing imports.
Identifying mismatched data types or incorrect function arguments.
3. Code Refactoring and Optimization
What It Does:
Cursor AI analyzes the existing code structure to identify areas that can be optimized. This includes suggesting more efficient algorithms, removing redundant lines, and simplifying complex logic structures.
Benefits:
Improves Performance: By optimizing code for better performance, it reduces runtime and resource consumption.
Enhances Readability: Simplified code structures are easier for other developers to read, understand, and maintain.
Encourages Best Practices: Refactoring suggestions promote the use of more modern, efficient coding patterns, aligning with industry standards.
Example Use Cases:
Replacing nested loops with list comprehensions or map functions in Python.
Simplifying complex conditional statements with concise, readable alternatives.
4. Automated Documentation Generation
What It Does:
Cursor AI can automatically generate documentation based on function definitions, parameters, and return values. It formats the documentation in a consistent style, such as Google Docstrings, JSDoc, or Sphinx.
Benefits:
Saves Time: Developers don’t need to manually write detailed documentation for every function, reducing repetitive work.
Ensures Consistency: Automated documentation maintains a consistent structure across all functions and modules, making it easier for teams to understand and maintain.
Improves Onboarding: Comprehensive documentation helps new developers onboard faster, reducing the learning curve for existing projects.
Example Use Cases:
Creating docstrings for data processing functions in data science projects. Here’s an example of Python functions for data processing in a data science project, each with clear, informative docstrings following common conventions (like Google style):
import pandas as pd

def load_data(filepath: str) -> pd.DataFrame:
"""
Load data from a CSV file into a pandas DataFrame.

Args:
filepath (str): The path to the CSV file.

Returns:
pd.DataFrame: DataFrame containing the loaded data.

Raises:
FileNotFoundError: If the file does not exist at the given path.
pd.errors.EmptyDataError: If the file is empty.
"""
return pd.read_csv(filepath)


def clean_data(df: pd.DataFrame) -> pd.DataFrame:
"""
Clean the input DataFrame by handling missing values and duplicates.

Specifically:
- Drops rows with any missing values.
- Removes duplicate rows.

Args:
df (pd.DataFrame): Raw input DataFrame.

Returns:
pd.DataFrame: Cleaned DataFrame with no missing values or duplicates.
"""
df_cleaned = df.dropna()
df_cleaned = df_cleaned.drop_duplicates()
return df_cleaned


def normalize_column(df: pd.DataFrame, column: str) -> pd.DataFrame:
"""
Normalize a numeric column in the DataFrame using min-max scaling.

Args:
df (pd.DataFrame): Input DataFrame.
column (str): Name of the column to normalize.

Returns:
pd.DataFrame: DataFrame with the specified column normalized between 0 and 1.

Raises:
KeyError: If the specified column does not exist in the DataFrame.
ValueError: If the column contains non-numeric data.
"""
if column not in df.columns:
raise KeyError(f"Column '{column}' not found in DataFrame.")
if not pd.api.types.is_numeric_dtype(df[column]):
raise ValueError(f"Column '{column}' must be numeric to normalize.")

min_val = df[column].min()
max_val = df[column].max()
df[column] = (df[column] - min_val) / (max_val - min_val)
return df
This style of docstring clearly explains the purpose, inputs, outputs, and possible exceptions for each function, which is very helpful in data science projects for maintainability and collaboration.
Documenting API endpoints in web development projects
Here is a Python example using Flask to document API endpoints with docstrings. The docstrings follow a clear format describing the endpoint’s purpose, parameters, and responses:
from flask import Flask, request, jsonify

app = Flask(__name__)

@app.route('/api/users', methods=['GET'])
def get_users():
"""
Retrieve a list of users.

Query Parameters:
limit (int, optional): Maximum number of users to return. Defaults to 10.

Returns:
200 OK: A JSON list of user objects.
400 Bad Request: If the 'limit' parameter is invalid.

Example:
GET /api/users?limit=5
"""
try:
limit = int(request.args.get('limit', 10))
if limit < 1:
raise ValueError
except ValueError:
return jsonify({"error": "Invalid 'limit' parameter"}), 400

# Dummy data for example
users = [{"id": i, "name": f"User {i}"} for i in range(1, limit + 1)]
return jsonify(users), 200


@app.route('/api/users/<int:user_id>', methods=['GET'])
def get_user(user_id):
"""
Retrieve details of a specific user by user ID.

Path Parameters:
user_id (int): The ID of the user to retrieve.

Returns:
200 OK: A JSON object with user details.
404 Not Found: If the user with the given ID does not exist.

Example:
GET /api/users/3
"""
# Dummy user data for example
if user_id < 1 or user_id > 10:
return jsonify({"error": "User not found"}), 404

user = {"id": user_id, "name": f"User {user_id}"}
return jsonify(user), 200


if __name__ == '__main__':
app.run(debug=True)
This style of docstring helps developers understand what each endpoint does, what parameters it accepts, and what responses to expect. It’s useful for generating API documentation or for quick reference during development.
5. Integration with Version Control
What It Does:
Cursor AI integrates seamlessly with version control systems like Git, allowing developers to track changes, generate commit messages, and review code diffs directly within the IDE.
Benefits:
Streamlines Collaboration: Developers can review code changes, identify conflicts, and resolve them within the same environment, reducing context-switching.
Automates Commit Messages: Cursor AI can suggest context-aware commit messages based on recent changes, ensuring clarity and consistency in version history.
Improves Code Review: By analyzing code diffs, Cursor AI can flag potential issues or inconsistencies before they are merged, enhancing overall code quality.
Example Use Cases:
Reviewing recent commits to identify unintended changes.
Generating concise, informative commit messages for new feature implementations.
Why These Features Matter
Each feature in Cursor AI is designed to address specific pain points in the development workflow:
Autocompletion and Code Suggestions speed up coding and reduce errors.
Error Detection and Debugging catch issues early, preventing bugs from propagating.
Code Refactoring and Optimization promote cleaner, more efficient code.
Automated Documentation Generation ensures consistency and saves time on manual documentation.
Version Control Integration enhances collaboration and code review processes.
By leveraging these capabilities, developers can significantly boost their productivity, reduce technical debt, and maintain high-quality, well-documented codebases.
Tips for Using Cursor AI Effectively
Cursor AI is a powerful tool, but to maximize its benefits, it’s essential to adapt its features to your specific workflow and project needs. Here’s how to use Cursor AI effectively:
1. Customize Settings for Each Project
What It Means:
Cursor AI provides customizable settings that allow you to tailor the tool’s behavior for different projects. This includes adjusting language preferences, documentation styles, and error detection parameters.
How to Implement:
Language Preferences: Define the primary programming languages for each project (e.g., Python, JavaScript, C++). This ensures that Cursor AI delivers more relevant code suggestions and optimizations.
Documentation Style: Choose a documentation format that aligns with the project’s requirements. For instance, a Python project may use Google Docstrings, while a JavaScript project may use JSDoc.
Error Detection Levels: Adjust the sensitivity of error detection. For example, in a development environment, you might enable comprehensive error checks, while in a quick prototyping phase, you could minimize alerts to maintain focus.
Benefits:
Increased Relevance: Customized settings ensure that the suggestions are specific to the coding language and project structure.
Consistent Documentation: Automated documentation follows the specified style, reducing inconsistencies across modules.
Efficient Debugging: Targeted error detection minimizes false positives and helps you focus on critical issues.
2. Utilize Keyboard Shortcuts
What It Means:
Cursor AI is packed with features that can be quickly accessed using keyboard shortcuts. These shortcuts are designed to streamline workflows and minimize time spent navigating menus.
Common Shortcuts:
Trigger Code Suggestions: Quickly generate code suggestions without breaking your workflow.
Generate Documentation: Automatically insert documentation templates for functions or classes.
Run Code Analysis: Initiate code analysis to detect errors or optimization opportunities.
Why It Matters:
Time Efficiency: Instead of clicking through multiple menus, you can execute actions instantly with a single keystroke.
Workflow Fluidity: Keyboard shortcuts keep you in the coding flow, reducing interruptions and increasing focus.
Reduced Cognitive Load: Fewer context switches mean less mental effort spent navigating the interface, allowing more focus on coding logic.
3. Access Community Resources and Support
What It Means:
Cursor AI has an active community where users share best practices, troubleshooting advice, and advanced usage tips. This community is an invaluable resource for getting the most out of the tool.
How to Leverage It:
Join the Cursor AI Community Forum: Access discussions on complex use cases, feature requests, and real-world applications.
Explore Tutorials: Follow step-by-step guides for implementing specific features, such as automated documentation or error detection.
Submit Feature Requests: Engage with the development team to suggest new features or improvements.
Troubleshooting Guides: Access detailed documentation to resolve common issues or bugs.
Benefits:
Peer Support: Learn from other developers who may have faced similar challenges.
Faster Issue Resolution: Access solutions to common problems without waiting for official support.
Advanced Tips: Discover creative use cases or workflows that you may not have considered.
4. Stay Updated
What It Means:
Cursor AI regularly releases updates that include bug fixes, new features, and performance enhancements. Staying current with these updates ensures optimal functionality and security.
How to Stay Updated:
Enable Automatic Updates: Allow the IDE or Cursor AI extension to auto-update whenever new releases are available.
Check the Release Notes: Visit the Cursor AI website or community forum to review the latest feature additions and changes.
Follow Cursor AI on Social Media: Updates, announcements, and new feature demos are often shared on platforms like Twitter, LinkedIn, or the official blog.
Benefits:
Access New Features: Stay ahead with the latest tools and features designed to improve productivity.
Improved Security: Regular updates often include security patches that protect your code and system.
Bug Fixes: Update releases resolve known issues, reducing the likelihood of encountering unexpected errors.
Why These Tips Matter
Maximizing the effectiveness of Cursor AI requires more than just installation — it involves strategic customization and consistent use of its features.
Customizing Settings tailors the tool’s behavior to align with specific project requirements, making it more relevant and effective.
Using Shortcuts accelerates workflow, keeping you in the coding zone without constant navigation.
Engaging with the Community provides ongoing learning opportunities, troubleshooting support, and insider tips.
Staying Updated ensures access to the latest features, security patches, and performance optimizations.
By implementing these strategies, developers can fully leverage Cursor AI as a comprehensive coding assistant that not only saves time but also enhances overall code quality and project efficiency.
Cursor AI is a valuable tool for developers seeking to streamline coding workflows, reduce errors, and maintain comprehensive documentation. While the tool offers robust AI-driven assistance, understanding its full range of features and customizing settings for specific projects can significantly enhance its effectiveness. For further information, visit the official Cursor AI documentation.


 We use cookies to ensure that we give you the best experience on our website and show you relevant advertising. If you continue to use this site we will assume that you are happy with it. To find out more read our